by
User Not Found
| Jun 10, 2016
Messenger is excited to announce the addition of a powerful new feature to the Make It! Personal web application: Auto-Distribute! This new feature allows you to quickly and easily distribute text with even spacing vertically or horizontally on a panel.
Note: Auto-Distribute is for text only, and not meant for pictures.
Vertical Auto-Distribution
1.) In Make It! Personal, Navigate to a panel for which you would like to more evenly space the vertical groupings.
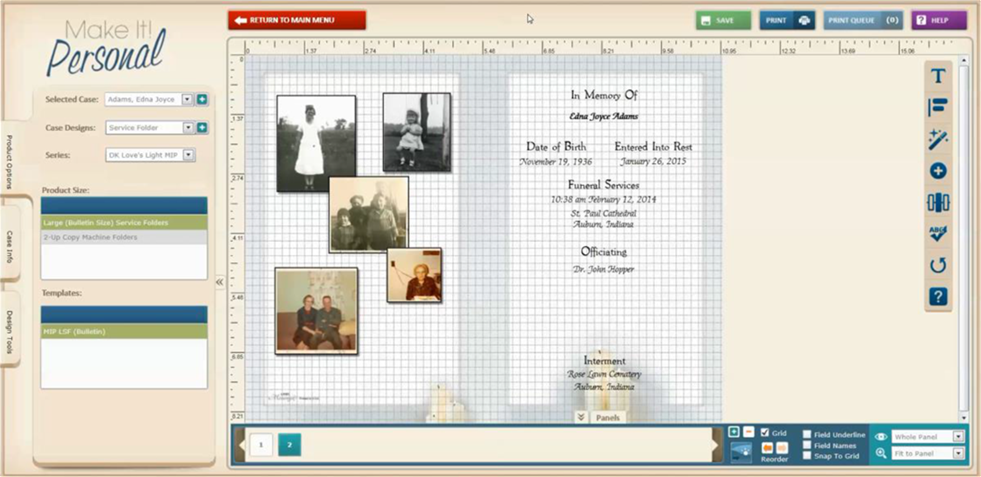
2.) With your mouse, click-hold and drag your cursor to draw a selection box around all the text fields you wish to redistribute.
NOTE: The top-most and bottom-most fields in your selection will form the upper and lower boundaries between which the text will be evenly distributed.
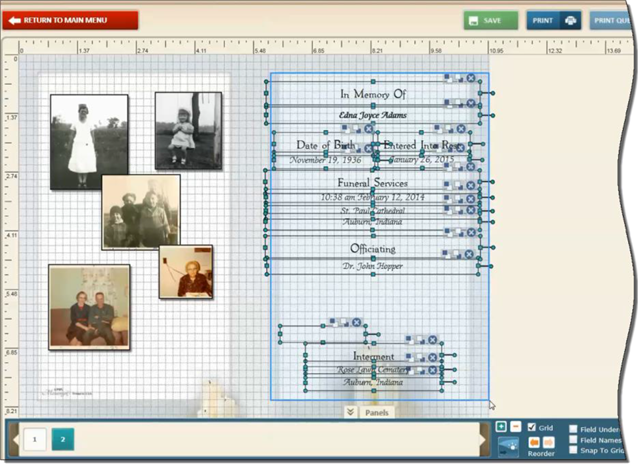
3.) With your fields selected, next click on the Auto-Distribute Selected Items icon on the toolbar. Then click on Auto-Distribute.
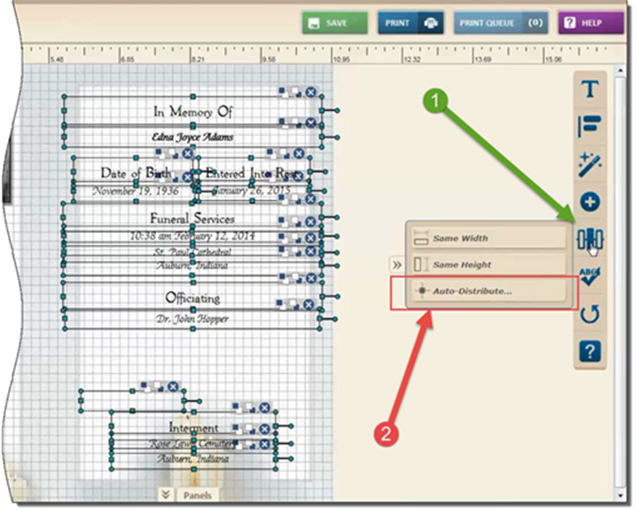
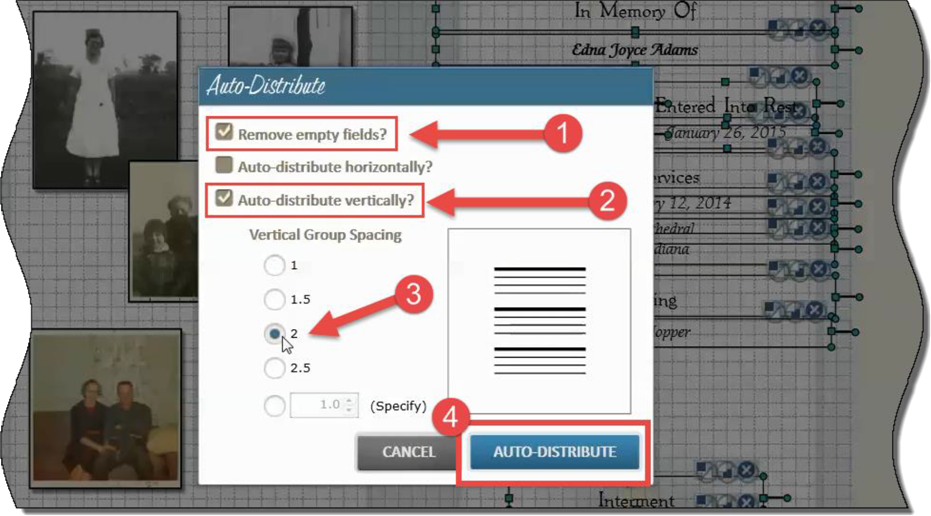
4.) The Auto-Distribute settings pop-up window gives us a couple of options to consider. First, the Remove Empty Fields checkbox will do just what it says, removing any fields that have no information to display, facilitating a more even distribution of text. We will cover horizontal distribution shortly, so for now check the box for Auto-Distribute vertically.
Next, choose your desired vertical spacing: lower numbers result in less space between lines, and higher numbers result in wider spacing between lines. When you’re ready click Auto-Distribute to apply the new spacing.
Your text has now been evenly distributed!
But wait, there’s more…!
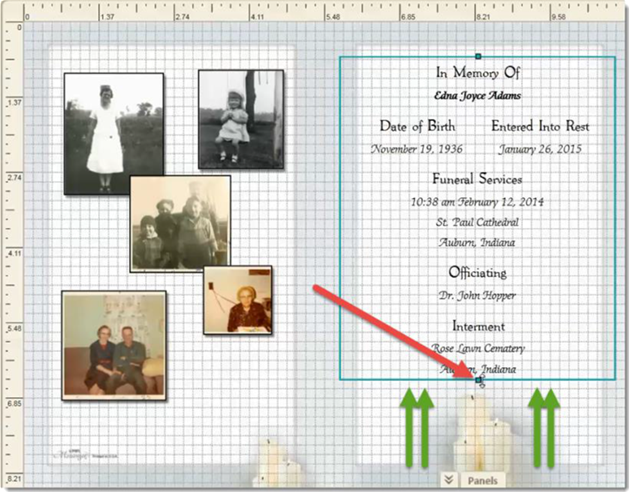
Notice how the light blue border remains, as well as top and bottom resize points. If desired, you can click-hold and drag the top or bottom border to "stretch" or "compress" the entire selection as needed. In the example shown, the bottom border is being dragged up so that it is no longer covering the candle image.
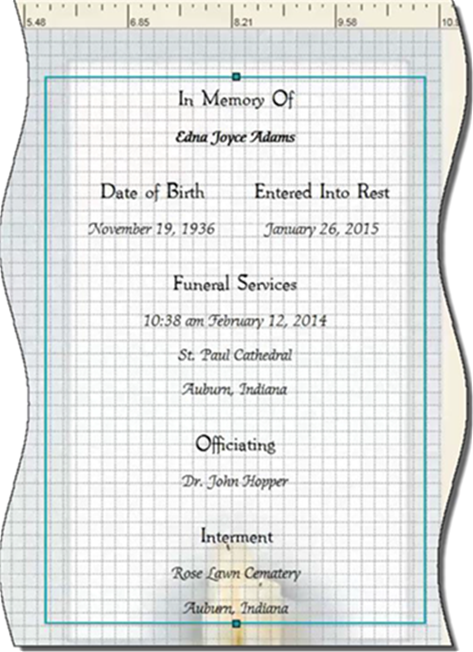
Be aware though, once you click off the selection you can no longer adjust the height of the entire selection at once (you can still adjust individual fields normally). Try it out yourself for maximum visual effect!
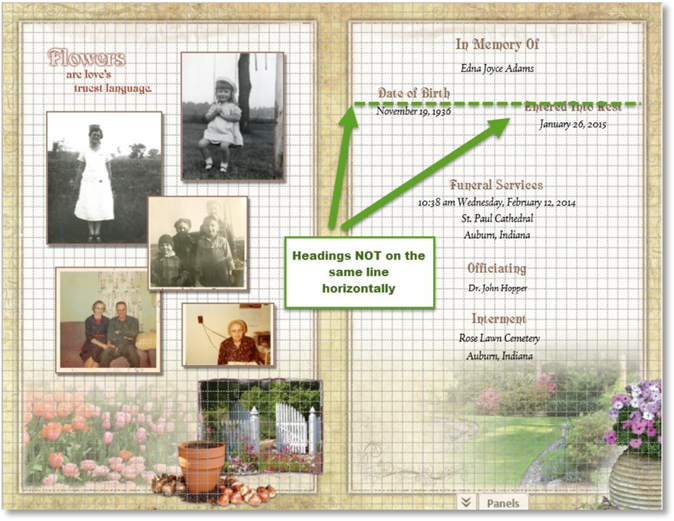
A Caution for Vertical Auto-Distribution:
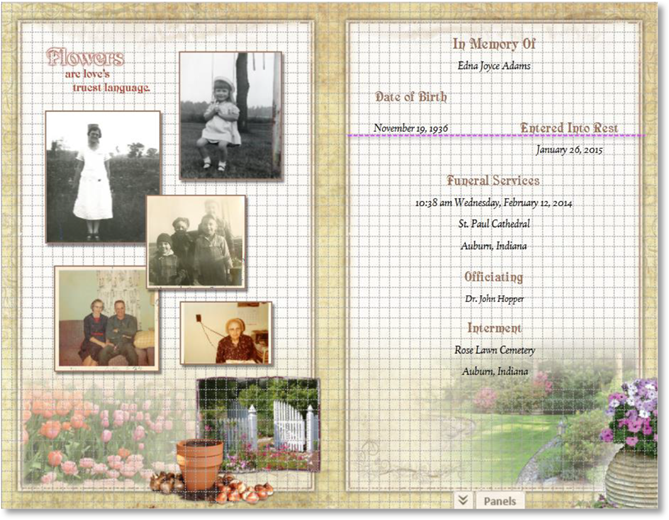
If you have two columns with headings that are not horizontally aligned, the Auto-Distribution may not function as expected, as it will attempt to align the fields to the text that is nearest to the other column vertically. See how the example below aligns the text "November 19, 1936" with the "Entered Into Rest" heading text.
Results:
Horizontal Auto-Distribution
Horizontal Auto-Distribution will not be necessary nearly as often as the vertical Auto-Distribution feature will, as most templates do not entail more than two columns of text. However, with the highly personalized nature of Make It! Personal, there may arise an occasional need for this feature.
In this example, we’ve decided we want to put the Pall Bearers in three columns. Ideally, one would set these up in this manner once, and then save it as a Custom Template.
1.) We’ll start this example from the point where we have already placed our names roughly where we want them. We’ve also used the Same Height and Auto-Distribute vertically tools, respectively, to clean up our vertical alignment.
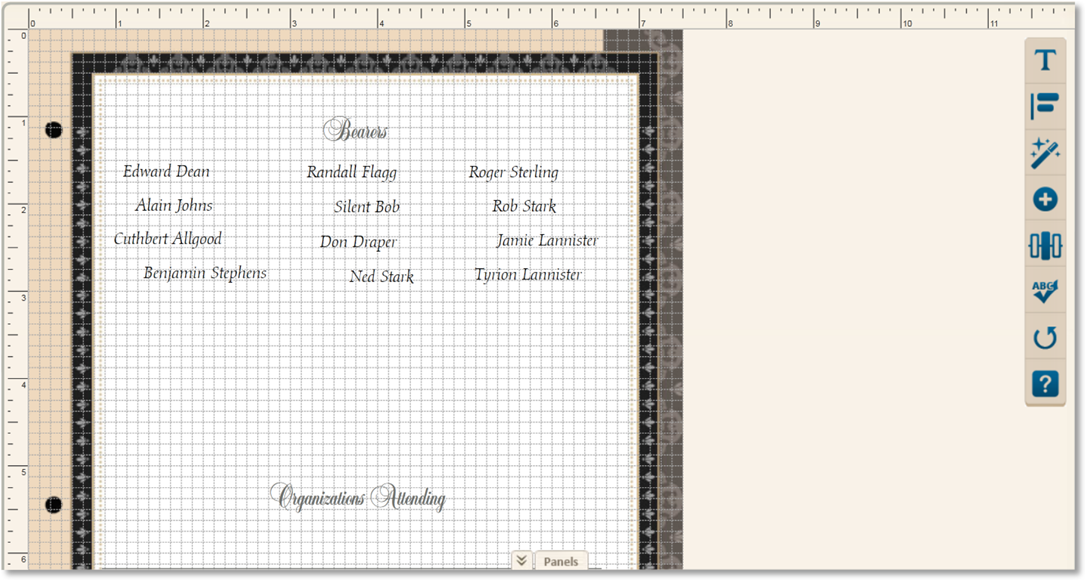
2.) Start by once again selecting the fields you want to align.
NOTE: The farthest left and right field borders in your selection will form the left and right boundary between which the text will be evenly distributed.
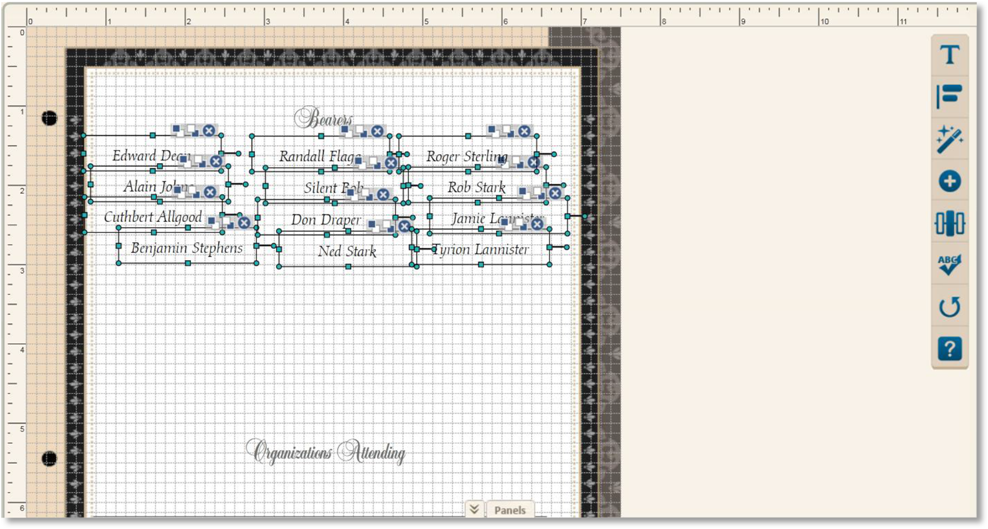
3.) Next, Click the Auto-Distribute Selected Items tool on the right hand toolbar, then on Auto-Distribute.
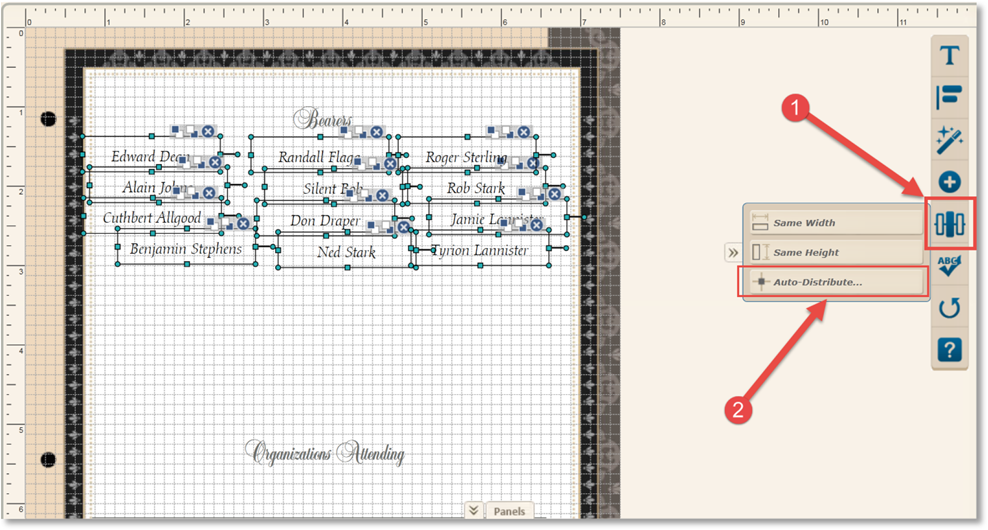
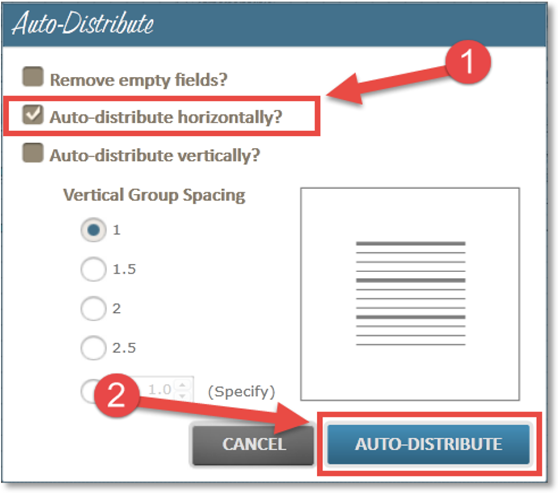
4.) Simply check the box for Auto-distribute horizontally, and then click Auto-Distribute. There are no spacing options as there were for the vertical Auto-Distribute.
Notice our Bearers’ names look much nicer now. However, they still look slightly shifted to the left. That’s OK, we can still make some adjustments using the resize points on the sides, as well as moving the entire selection together.
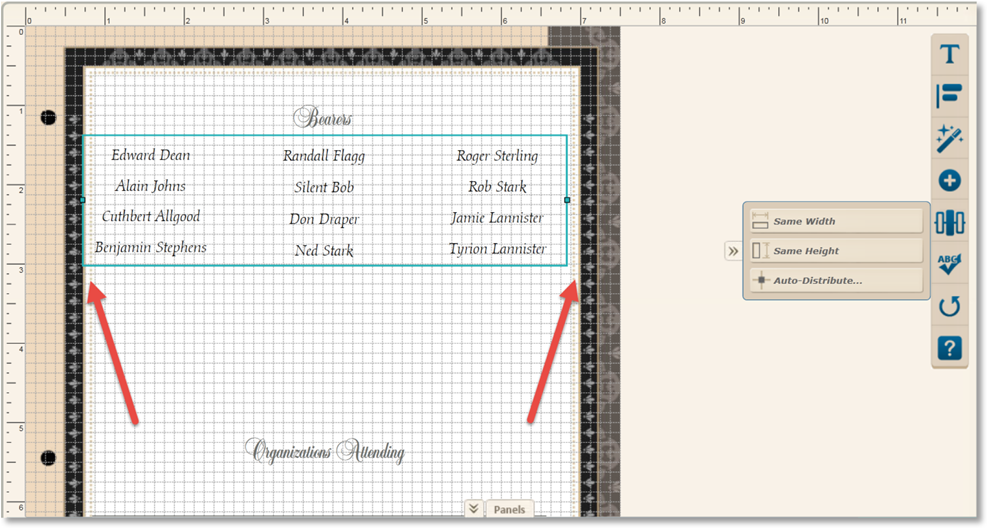
Below we’ve dragged the resize points on the right and left to common reference points using the grid lines as a guide. To move the entire selection at once, move your mouse cursor around the selection until it changes to a pointing hand, then click-hold and drag the selection as desired.
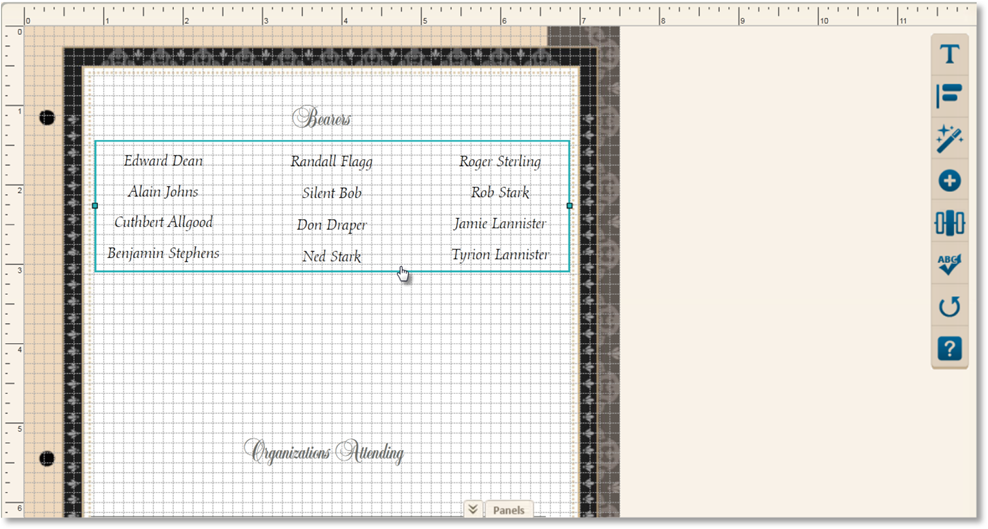
Now our Bearers’ names are nicely aligned and centered, giving a professional, polished look to your personalized design!