by
User Not Found
| Jun 16, 2016
The service folder is one of our most common products and it offers plenty of space for personalized photos and text. In this workshop, you will create a service folder using one of the cases you have created and will be adding a few personalized elements to make this a much more meaningful product.
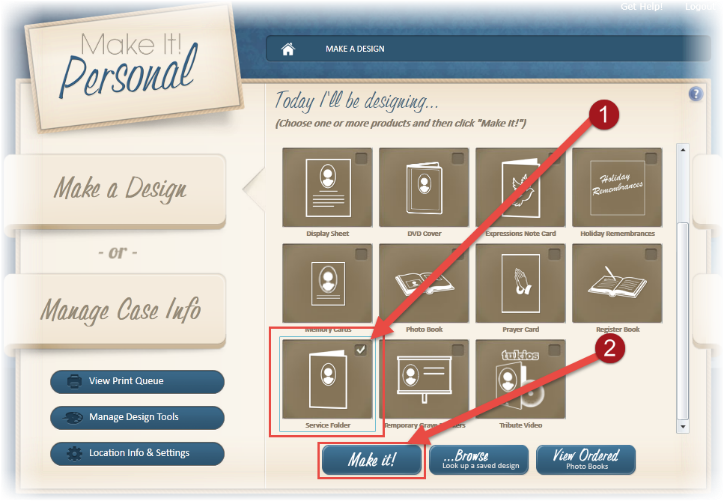
1.) From the Make It! Personal home page, select the “Service Folder” icon.
2.) Click the “Make It!” Button.
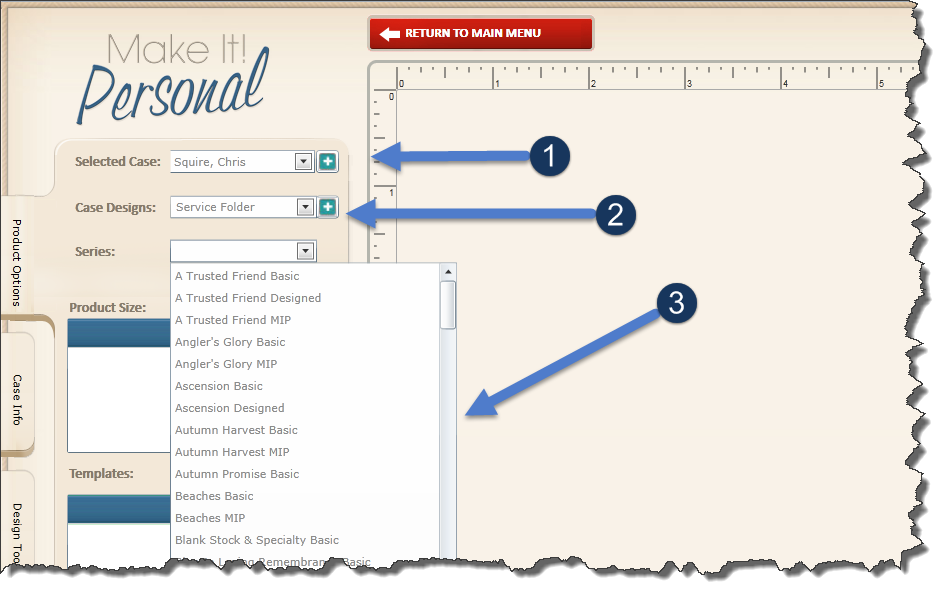
1.) In the upper left‐hand corner of the screen, select the case you are working on from the “Selected Case” drop down list.
2.) Verify that the “Case Designs” drop down list is showing “Service Folder.”
3.) Within the “Series” drop down list, please select the stationery series you intend to use for this case.
The Make It! Personal web application will now automatically generate the standard Service Folder template for the stationery series you have selected.
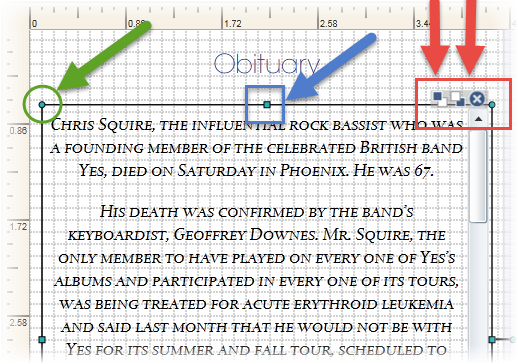
1.) Often, the obituary that appears on the back page will not entirely fit within the standard text box. To resize a field, select the text box with a single click. A selection box should appear around the text box with resizing points located on each side and corner as well as two layering icons and a delete button in the upper right hand corner of the text box. Click and drag the resizing points located on each corner and edge of the text box.
2.) You may also be required to increase or decrease the size of the font so that it fits well within the text box.
3.) After making any necessary changes to the size of the obituary text box, please go to the second page of this design by selecting the white box labeled with a “2” below the template area.

4.) Select the upper left hand photo. With the photo selected, please click the “X” to remove this text box from the design.
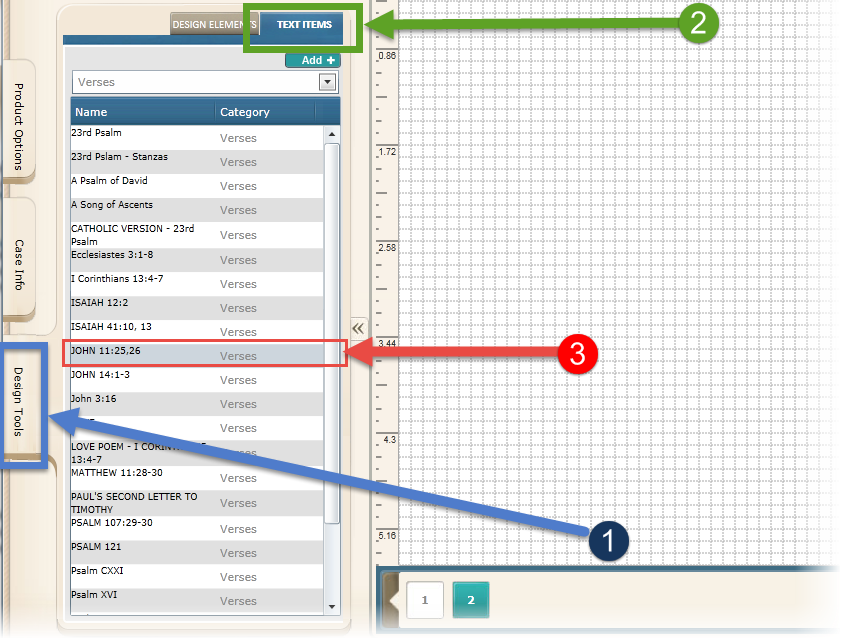
5.) On the left side of the screen is a tab labeled “Design Tools.” Please select this tab.
6.) Scroll down and select the verse “John 11:25, 26” by clicking on the name. This will add this verse to the design.
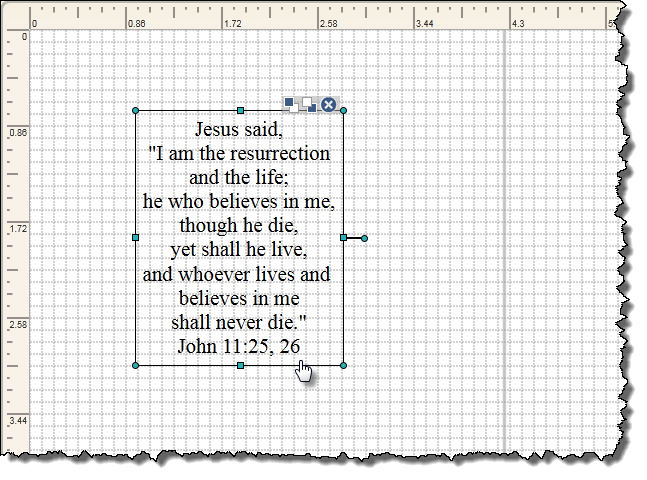
7.) By hovering your cursor over the edge of the text box, your cursor will transform into a hand icon. At this point, click and drag that verse into the area where the photo was previously at.
With the actions demonstrated in this guide, you should be able to create, navigate and modify templates for any of the products Make It! Personal offers. Continue on to the following guides to discover how you can further customize and edit these designs for your customers.